FITTED: WORKSHOP GRAPHICS STICKER KIT
What’s the best way to give your bike a new visual lease of life? A set of graphics may not increase your riding ability, but it will take your bike from bone dry to dripping wet!
Sometimes…you just want to look cool, and that can be the be-all-end-all of it. So what do you do?
Graphics.
Sometimes you want to buy a new bike, but you can’t afford it. But you want to have that new bike look - so what do you do?
Graphics.
And sometimes you just have a hankering to plaster your business, sponsor, wife, or mom all over your bike because you love them so, so much. So then what do you do?
If you guessed Graphics, you are correct.
Graphics are a quick and relatively cheap way to make your old dog look like a cool cat in the blink of about 45-minutes to an hour. It can make you feel like you have a new bike and give you a warm fuzzy feeling. And if we know anything about 2021 and feelings, feeling good about yourself has long-lasting effects that are still baffling scientists today. Anywho, more about the actual graphics.
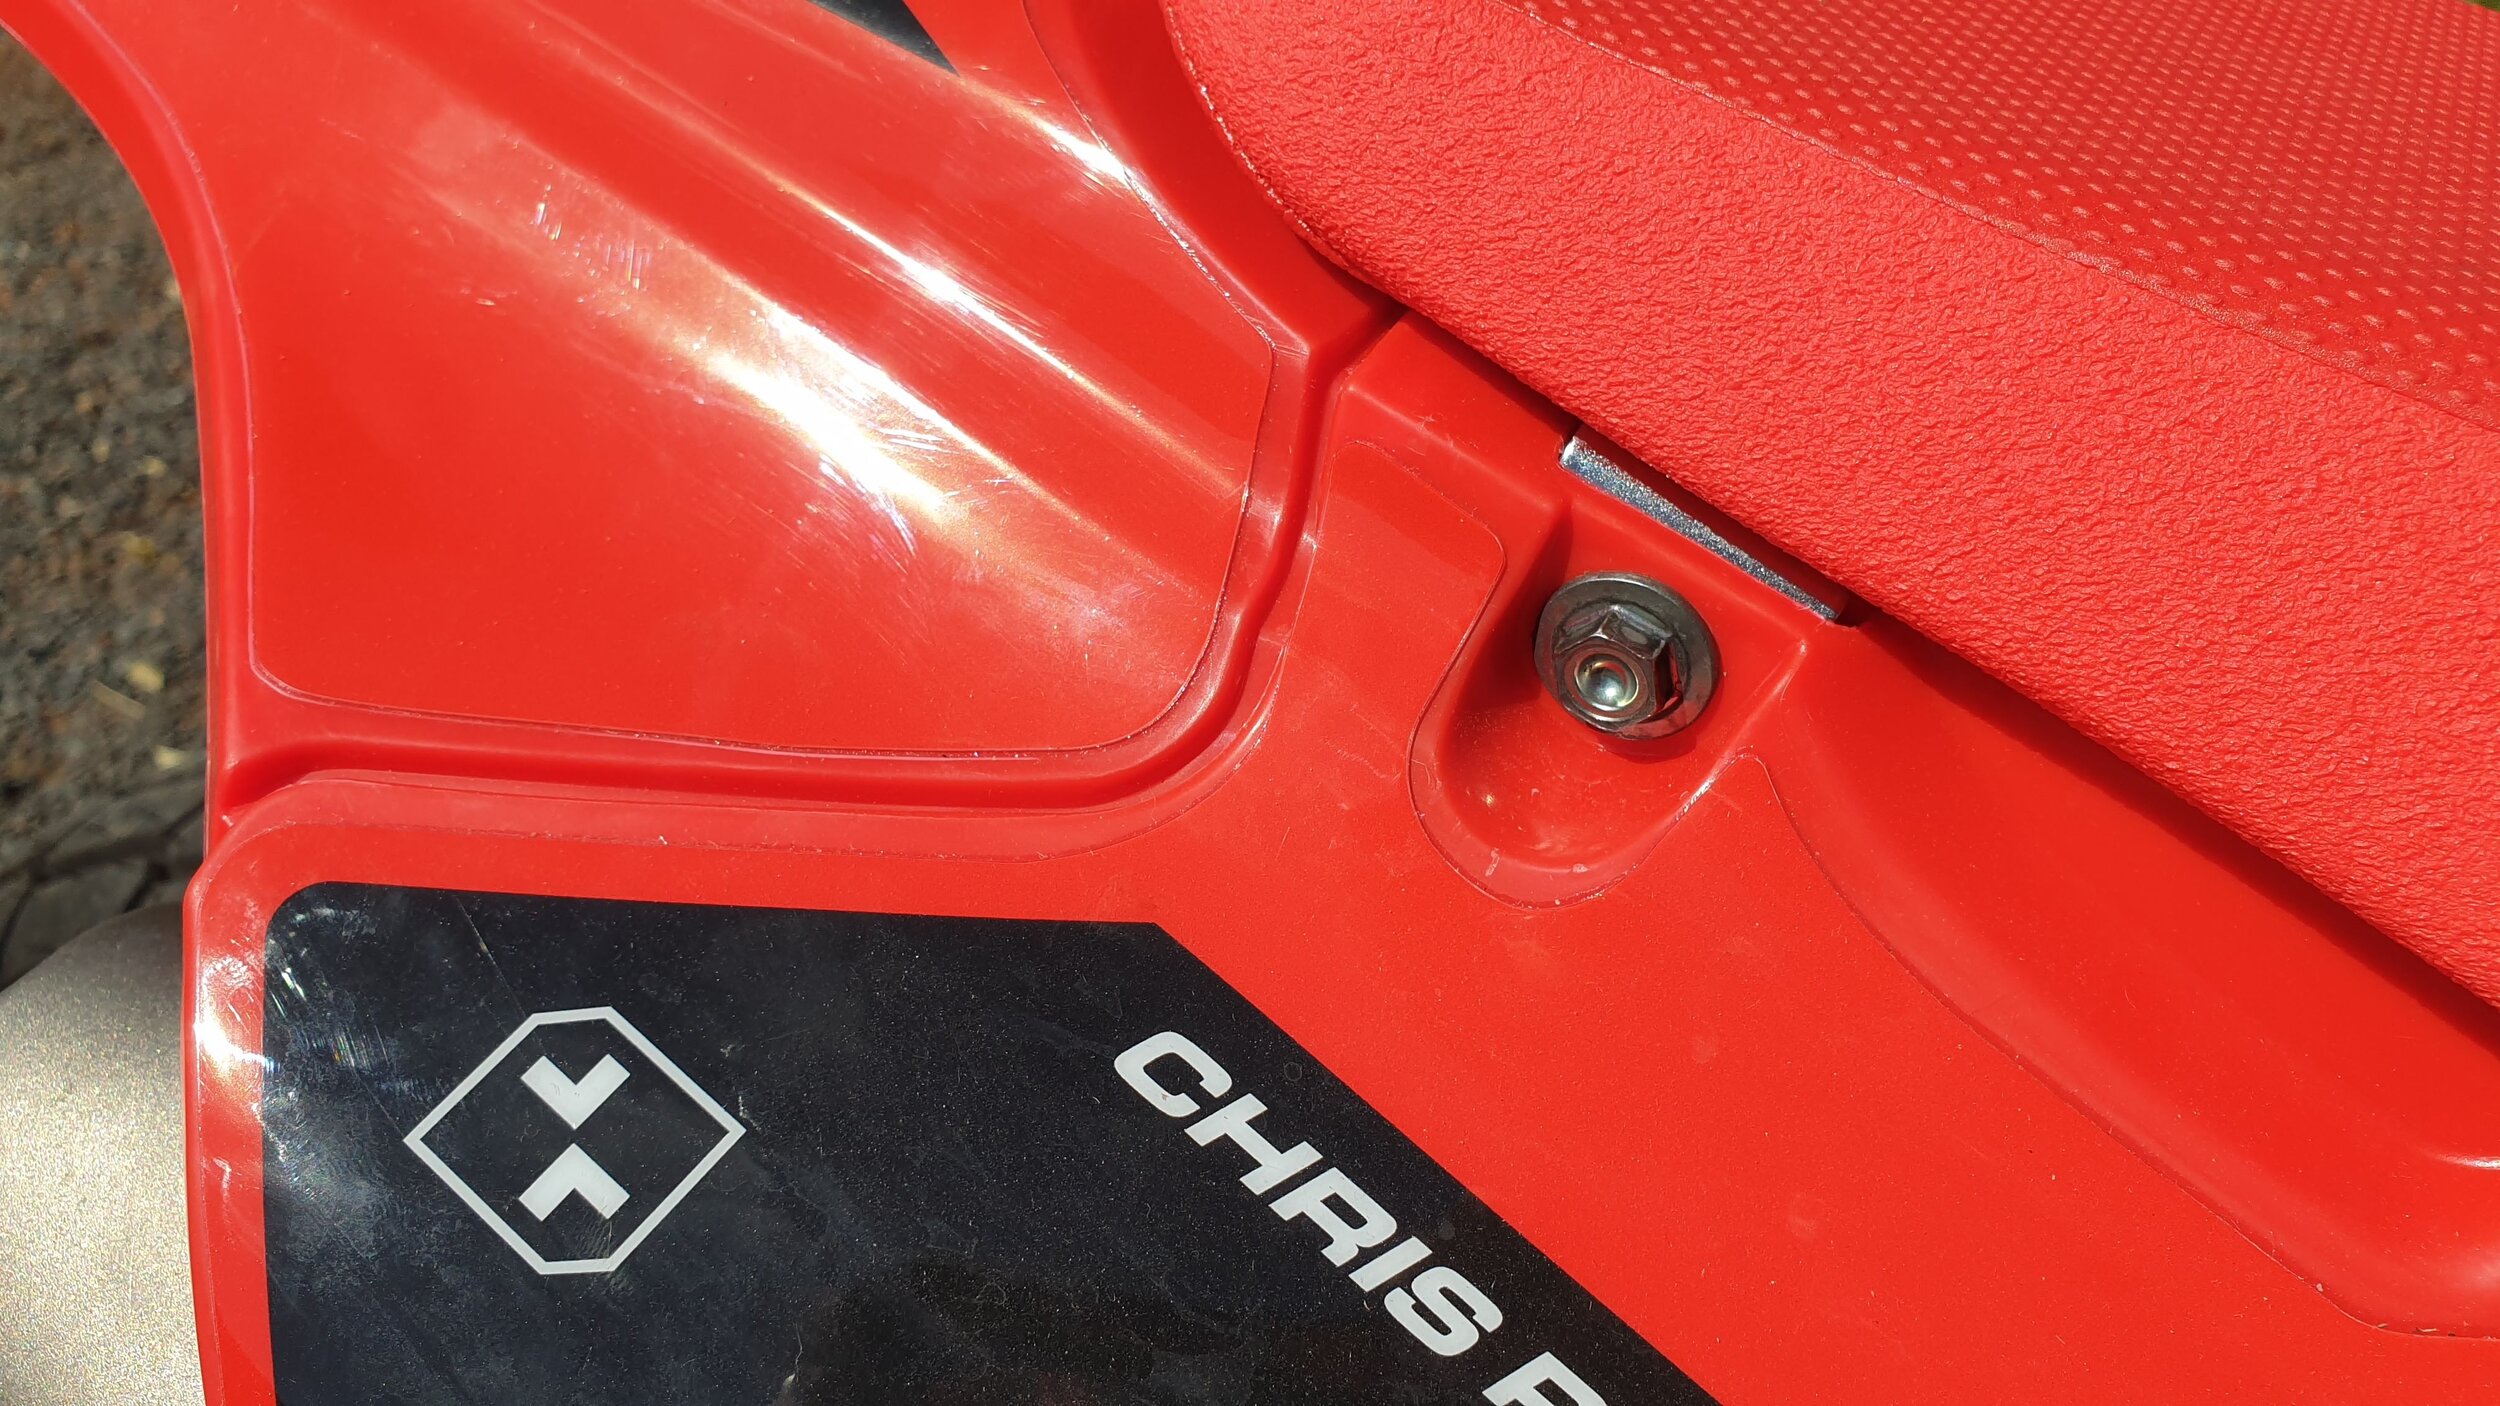
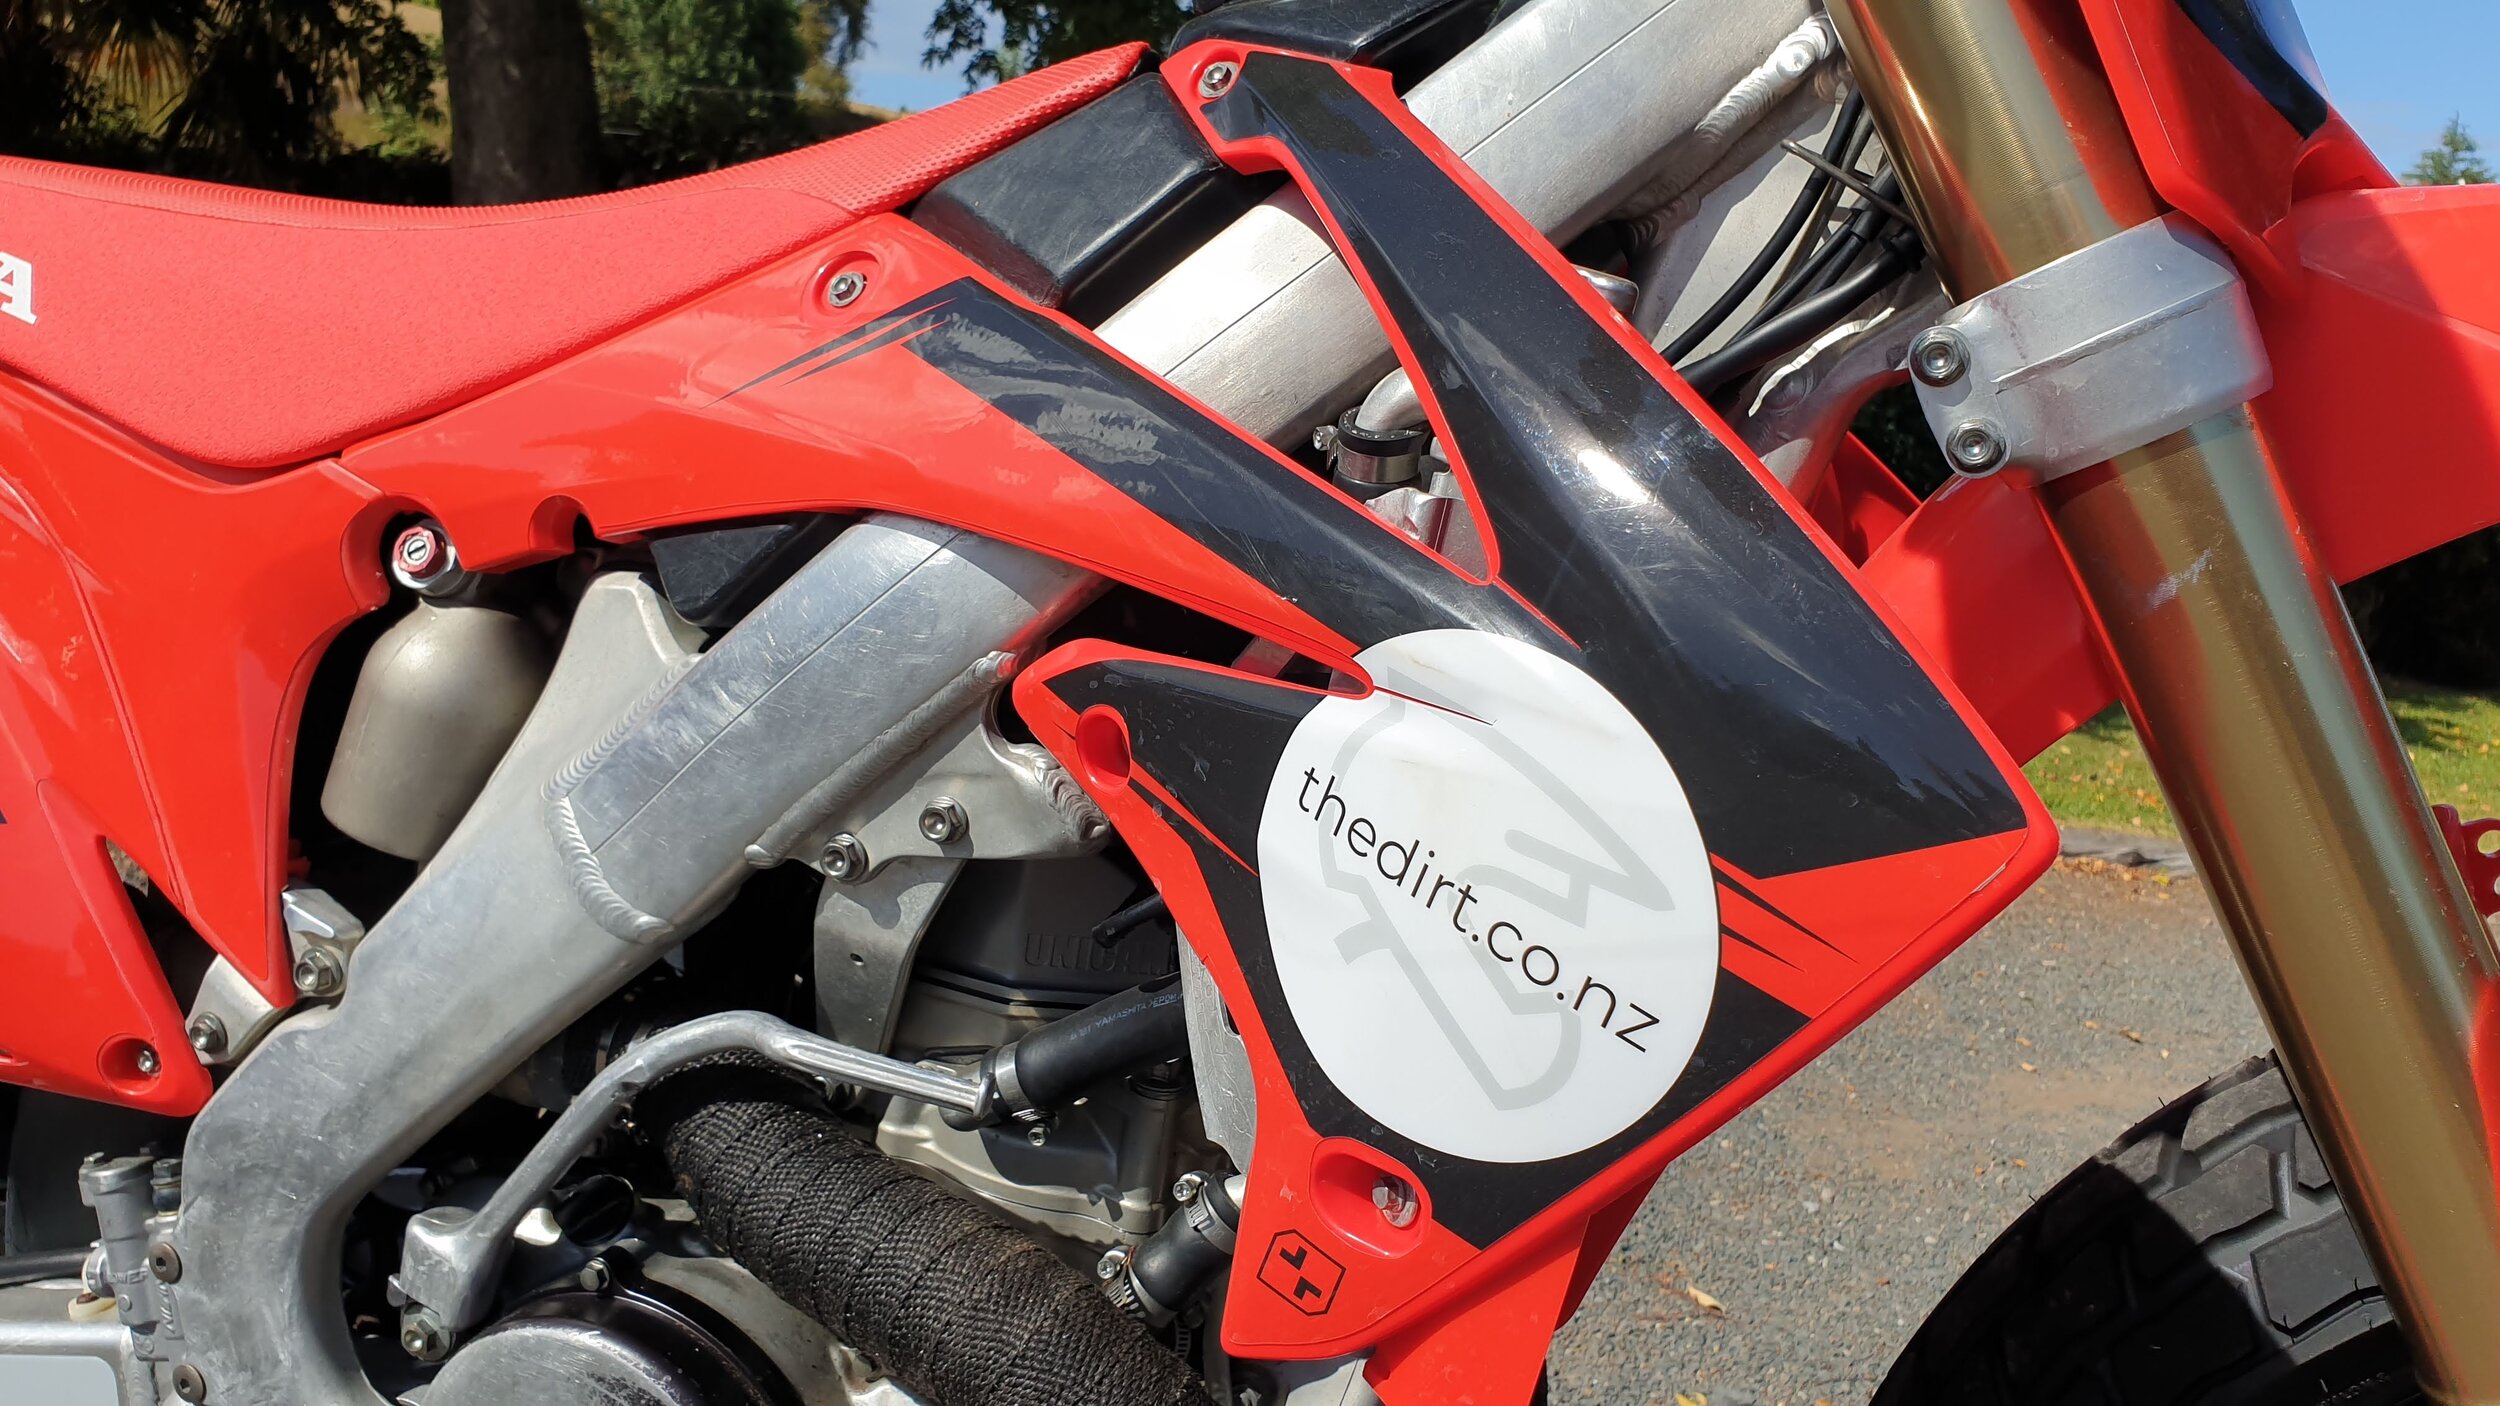
Good fitment and great colour matching.
If you ask me, the not-so secret to a great graphics kit is fitment and colour matching. The kit needs to fit your plastics perfectly and if you’re going for a colour that is the same as your plastics, then getting it as close as possible is a huge factor in getting that look you have in your head.
Now with templates, the majority of them out there are pretty good - well at least the ones I have used over the years. So it all comes down to the companies cutting abilities after printing. I have used Workshop Graphics for a while now, even back when the company was really getting into the moto sticker market. They were good back then and the same can be said today. This kit is for my 2009 CRF450R and as you can see, the fitment is bang on, and it’s hard to see where the stickers start and stop, thanks to a great colour match.
A lot of the fitment, however, does come down to the installer. If you are terrible at putting stickers on then no amount of perfect cutting from the company will help you out. So take your time, be patient, and expect to make a few mistakes along the way.
If you do make some mistakes, you can trim off the excess, where the stickers tail off the plastics. Workshop Graphics provides a comprehensive installation guide to help. If you can grab the Mrs hair dryer that will be helpful on the tricky plastics like the exhaust side panel. Heating the sticker will help it mold better if you get a little off-kilter.
If you like what you see from the hundreds of designs on their website, you can get a kit pretty quickly. Or, if you want something more personalised, they will make a custom kit up for you with whatever you want on it. I saw a kit last week with Dragon Ball Z animations all over it - so really the possibilities are endless.
What I like most about the Workshop Graphics kit is that it fits perfectly, you can’t decipher stickers from plastics when looking from the side of the track, and the wearability of the product itself is very durable and long-lasting.
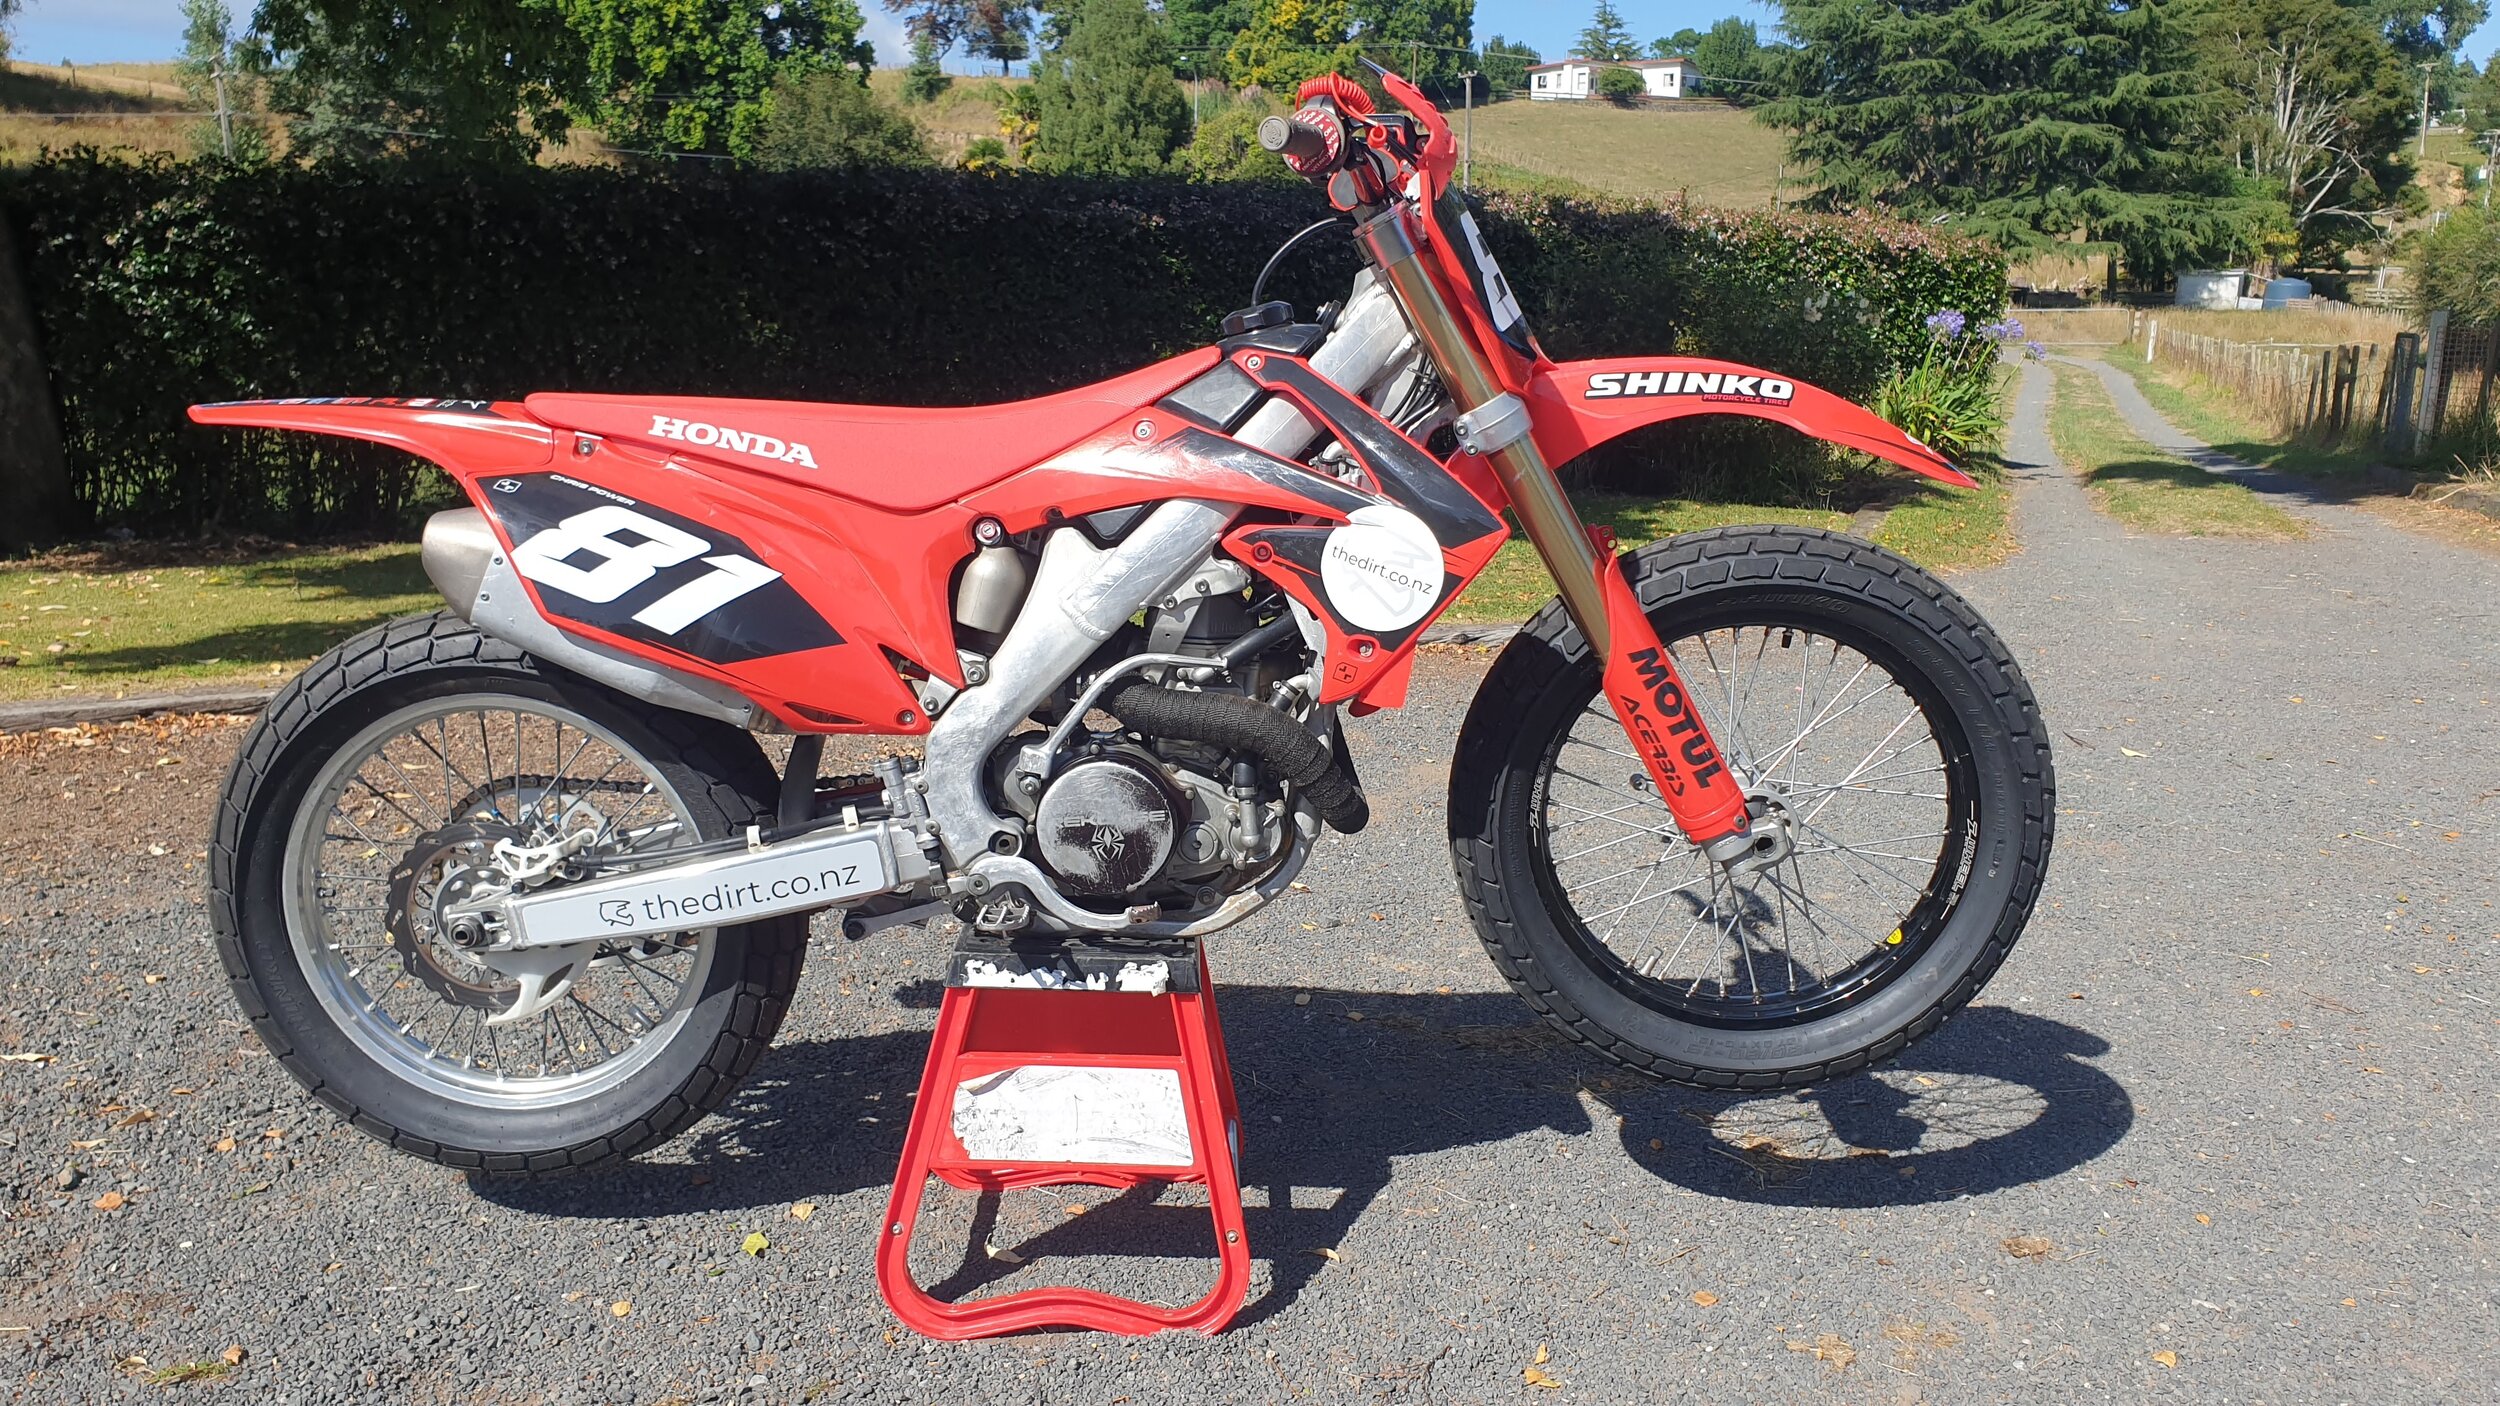
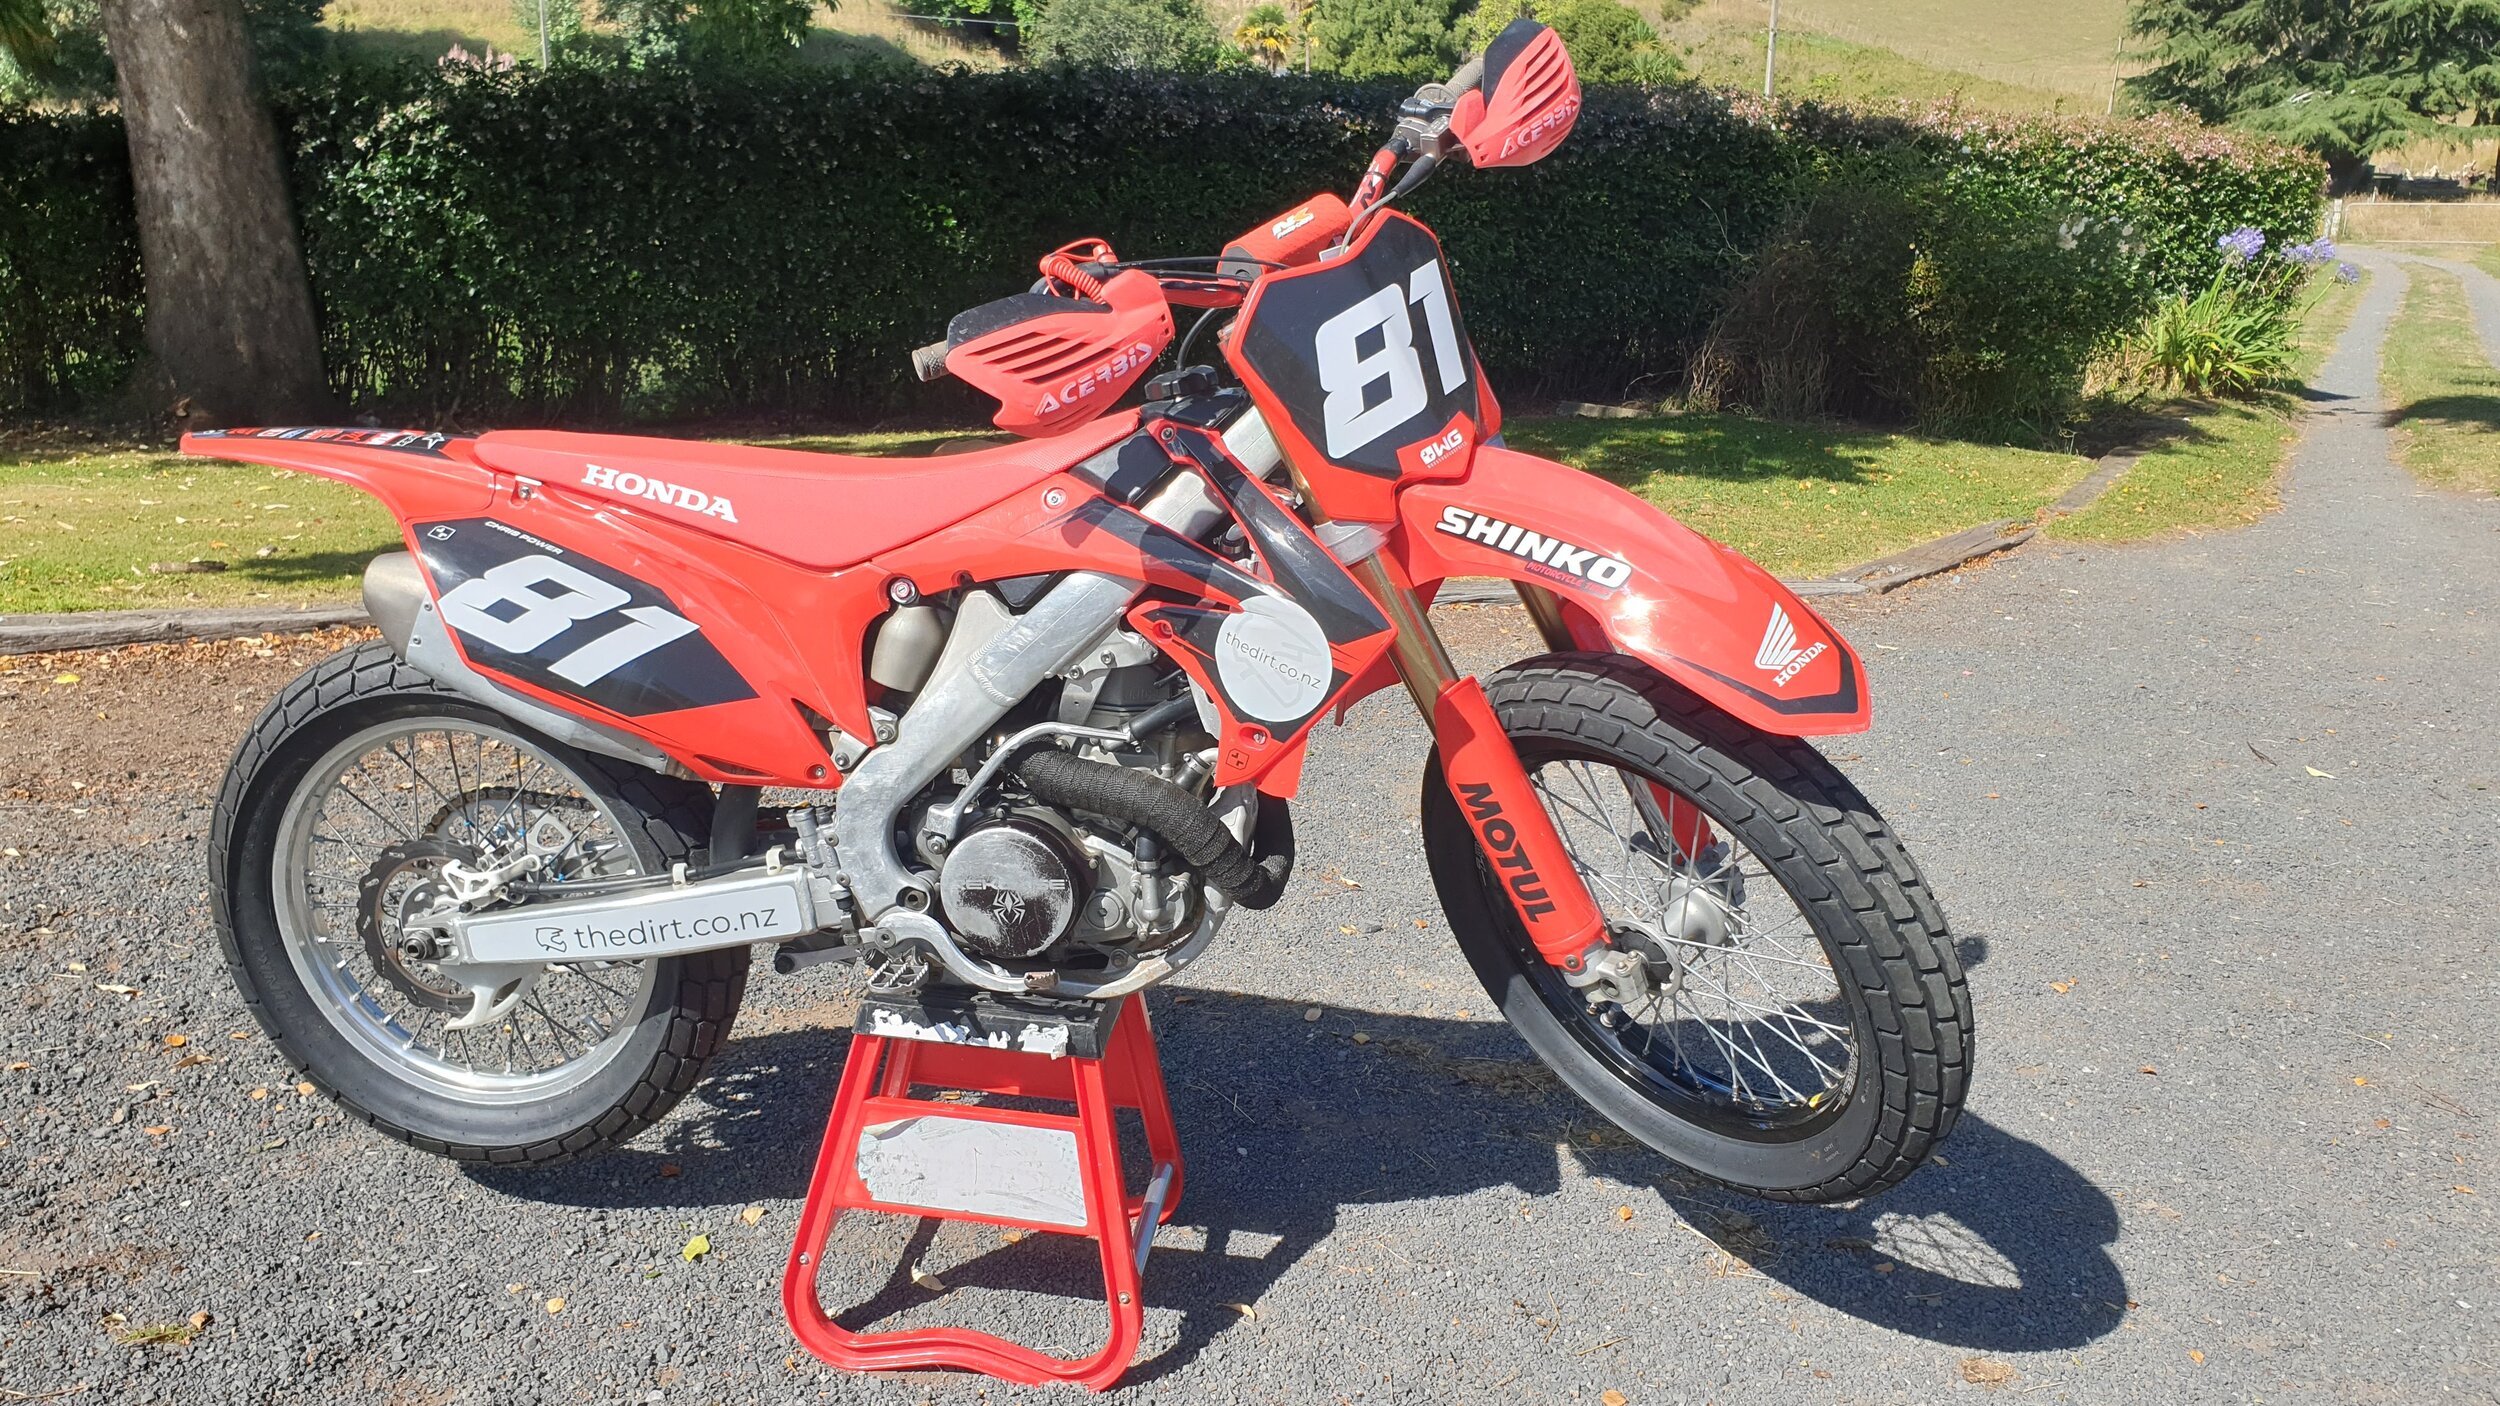
Check out this text-book before and after pics showing the transformation of the old girl. I know she’s had a few more things done than just the sticker kit, but you get the idea.
Before
After
Graphics don’t claim to make you ride faster on the track..but come on. Look good, feel good, ride good. Seems legit to me?
I want to thank Workshop Graphics for coming on board with my Flat track racing and getting the old girl looking so fresh and so clean. I had a picture in my head of what I wanted and I think it turned out great.
Check out the Workshop Graphics Website and see if something tickles your exhaust pipe. Or chat to Darryl or one of his team about getting something a little more custom for your steed.
And remember what Ricky Bobby says…If you’re not fast your last. And if you’re last, you might as well look good.
Related Content


You Might Also Like